 Pin This
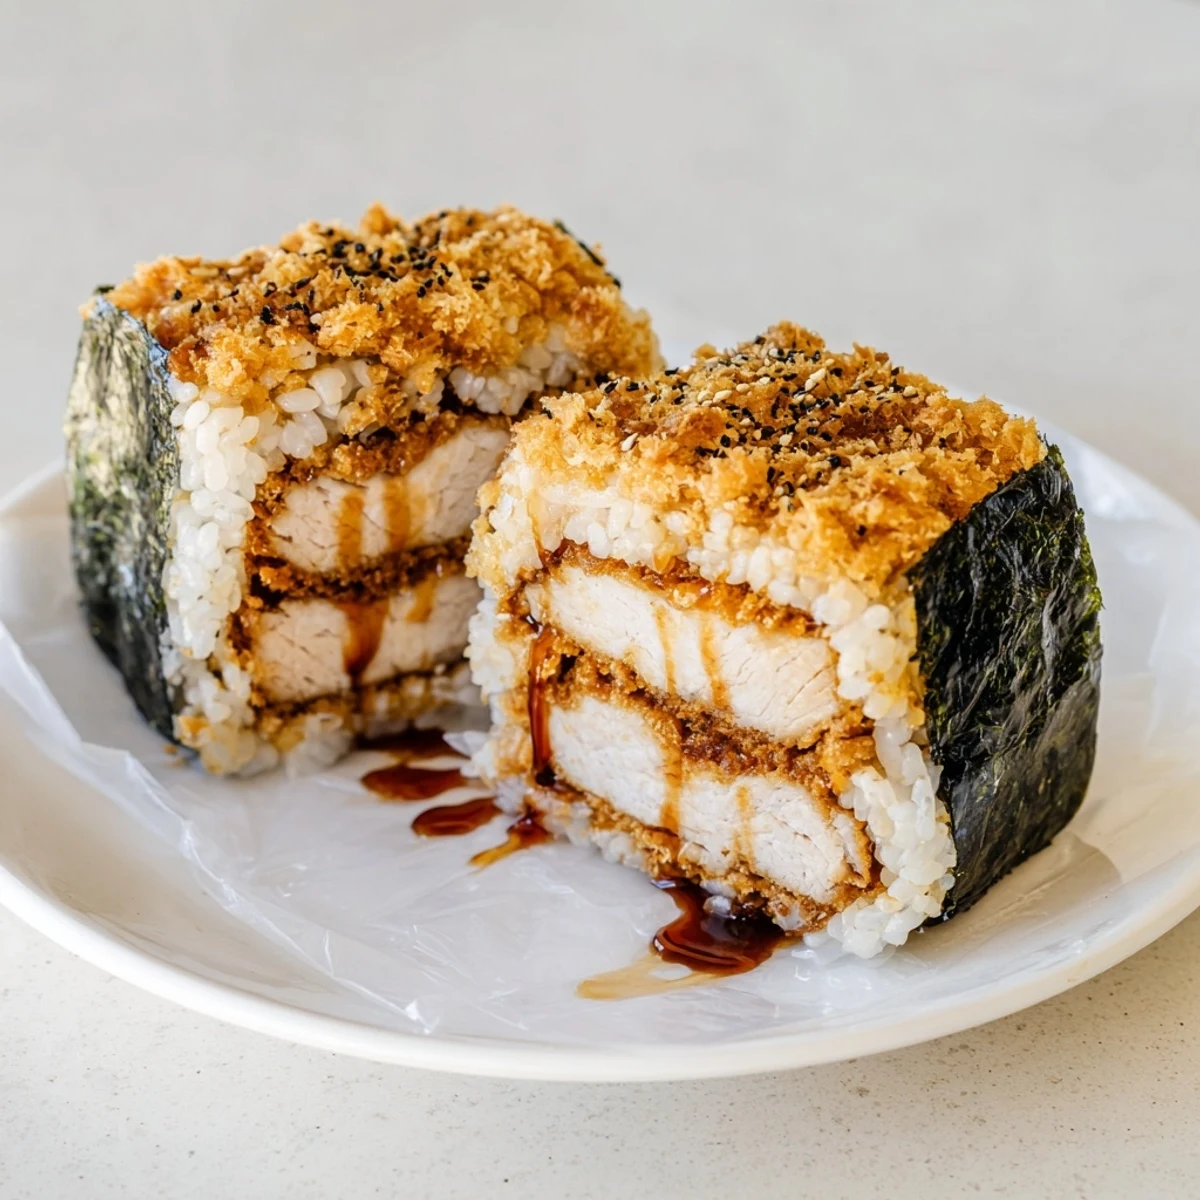
 This handheld delight layers golden, panko-crusted chicken thighs with vinegar-seasoned short-grain rice and a sweet-savory tonkatsu blend, all wrapped in nori sheets for easy eating. The preparation creates perfectly portable portions ideal for lunchboxes or snacking.
Press warm rice into compact rectangles, top with freshly fried chicken strips, drizzle with the honey-kissed sauce, then wrap tightly with seaweed. The nori softens slightly while holding everything together, creating that satisfying contrast between crispy coating, tender meat, and sticky rice.
The first time I bit into chicken katsu musubi at a Honolulu beach park, I couldn't believe how something so simple could taste so perfect. The crispy chicken against soft rice, wrapped in that slightly salty nori, it's the kind of food that makes you pause mid-bite. I've been making them ever since, tweaking and testing until I found the version that hits every single note.
Last summer, I made a batch for a potluck and watched them disappear in under five minutes. My friend's kids, who usually claim they don't like seaweed, came back asking for seconds. That's when I knew this recipe wasn't just good, it was the kind of good that converts people.
Ingredients
- 2 boneless skinless chicken thighs: Thighs stay juicier than breast, which matters since you're slicing them thin
- 1/2 teaspoon salt and 1/4 teaspoon black pepper: Season generously because the breading will mute some of the salt
- 1/2 cup all-purpose flour: Your first layer of defense for keeping that coating stuck to the chicken
- 1 large egg mixed with 1 tablespoon milk: The milk thins the egg just enough for an even coat
- 1 cup panko breadcrumbs: Don't substitute regular breadcrumbs, panko creates that distinct shatteringly crisp texture
- Vegetable oil for frying: You need about half an inch in the pan, enough to come halfway up the chicken
- 2 cups warm cooked short-grain rice: The warmth helps the vinegar mixture absorb evenly
- 1 tablespoon rice vinegar, 1/2 teaspoon sugar, and 1/2 teaspoon salt: This seasoned rice mixture is what elevates it from plain rice to something special
- 2 tablespoons tonkatsu sauce mixed with 1 tablespoon soy sauce and 1 teaspoon honey: The honey balances the salty tang and helps the sauce cling to the chicken
- 4 sheets nori halved: Cut them before you start assembling, trying to do it mid-recipe gets messy
- Furikake: Totally optional but that umami sprinkle between rice layers makes a difference
Instructions
- Pound and season the chicken:
- Place each thigh between plastic wrap and pound until even, about half an inch thick. Season both sides generously with salt and pepper, letting it sit while you set up your breading station.
- Create the breading line:
- Set up three shallow bowls: flour first, then egg whisked with milk, then panko. Dredge each thigh in flour, shake off excess, dip in egg, and press firmly into panko until coated.
- Fry to golden perfection:
- Heat half an inch of oil over medium heat until shimmering. Fry chicken 3-4 minutes per side until deep golden brown and cooked through. Drain on paper towels and slice into strips that will fit your musubi shape.
- Season the rice:
- Mix rice vinegar, sugar, and salt in a small bowl until dissolved. Gently fold through warm rice, being careful not to mash the grains, then let cool slightly so it's easier to handle.
- Whisk the sauce:
- Combine tonkatsu sauce, soy sauce, and honey in a small bowl until smooth. The honey should fully incorporate, creating a glossy consistency that's perfect for drizzling.
- Start assembling:
- Lay a halved nori sheet shiny side down on plastic wrap. With wet hands, press about 1/4 cup seasoned rice into a compact rectangle in the center, slightly smaller than your nori.
- Layer the flavors:
- Sprinkle with furikake if using, then place a chicken slice on top. Drizzle with just enough sauce to coat, add another thin rice layer, and press everything gently but firmly.
- Wrap and rest:
- Fold the nori around the filling using the plastic wrap to tightly compress the musubi. Let rest 2-3 minutes so the nori softens and seals, then repeat with remaining ingredients.
 Pin This
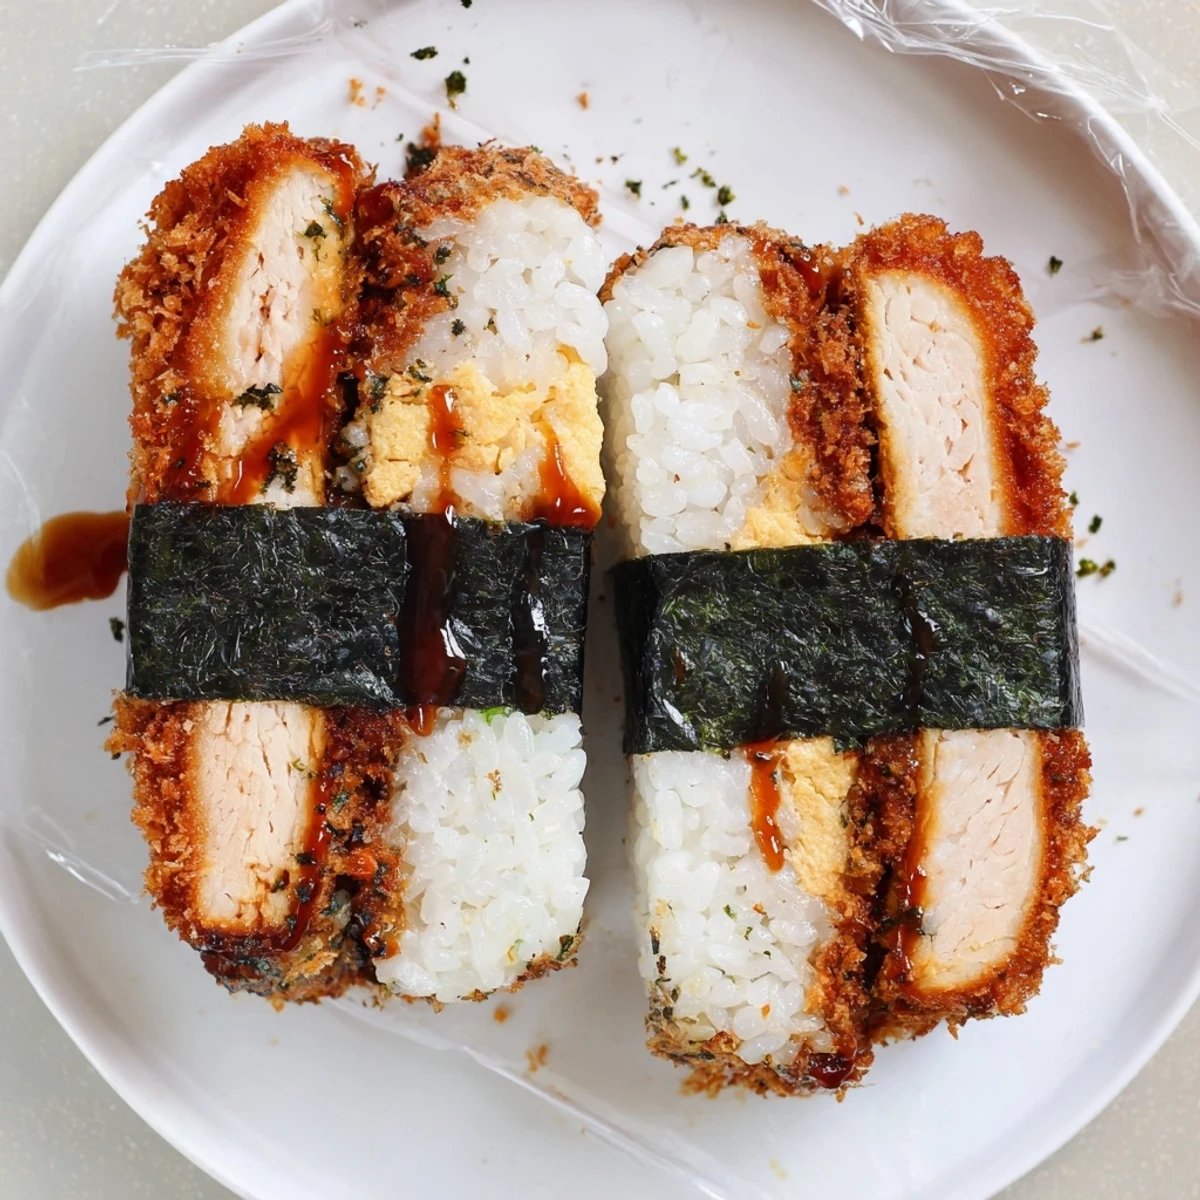
 My favorite memory with these musubi was packing them for a sunrise hike. Eating warm chicken katsu musubi while watching the sun come up over the ocean, I felt like I'd cracked some secret code to happiness. Food tastes better outside anyway, but something about the portability of musubi makes it feel like you're carrying a little celebration with you.
Getting The Rice Right
After years of making this, I've learned that rice temperature matters more than I thought. If it's too hot, the vinegar mixture cooks the grains oddly. Too cold, and it won't absorb properly. That sweet spot, warm but not steaming, makes the difference between rice that holds together and rice that falls apart when you take a bite.
Sauce Consistency Secrets
The sauce needs to be thick enough to cling but thin enough to drizzle. Sometimes the honey doesn't fully incorporate at room temperature, so I give it ten seconds in the microwave. That slight warmth helps everything blend into a glossy, pourable consistency that coats the chicken without making the rice soggy.
Make-Ahead Mastery
I used to think musubi had to be eaten immediately, but I've discovered they're actually fantastic for meal prep. Wrap each one individually in plastic wrap while the nori is still slightly crisp from folding. They'll soften in the fridge but the texture difference between the nori and the chicken remains intact.
- Don't assemble more than 24 hours ahead or the nori gets unpleasantly chewy
- If packing for lunch, wrap in wax paper inside your container to prevent sogginess
- Extra sauce on the side keeps everything fresh without compromising the musubi structure
 Pin This
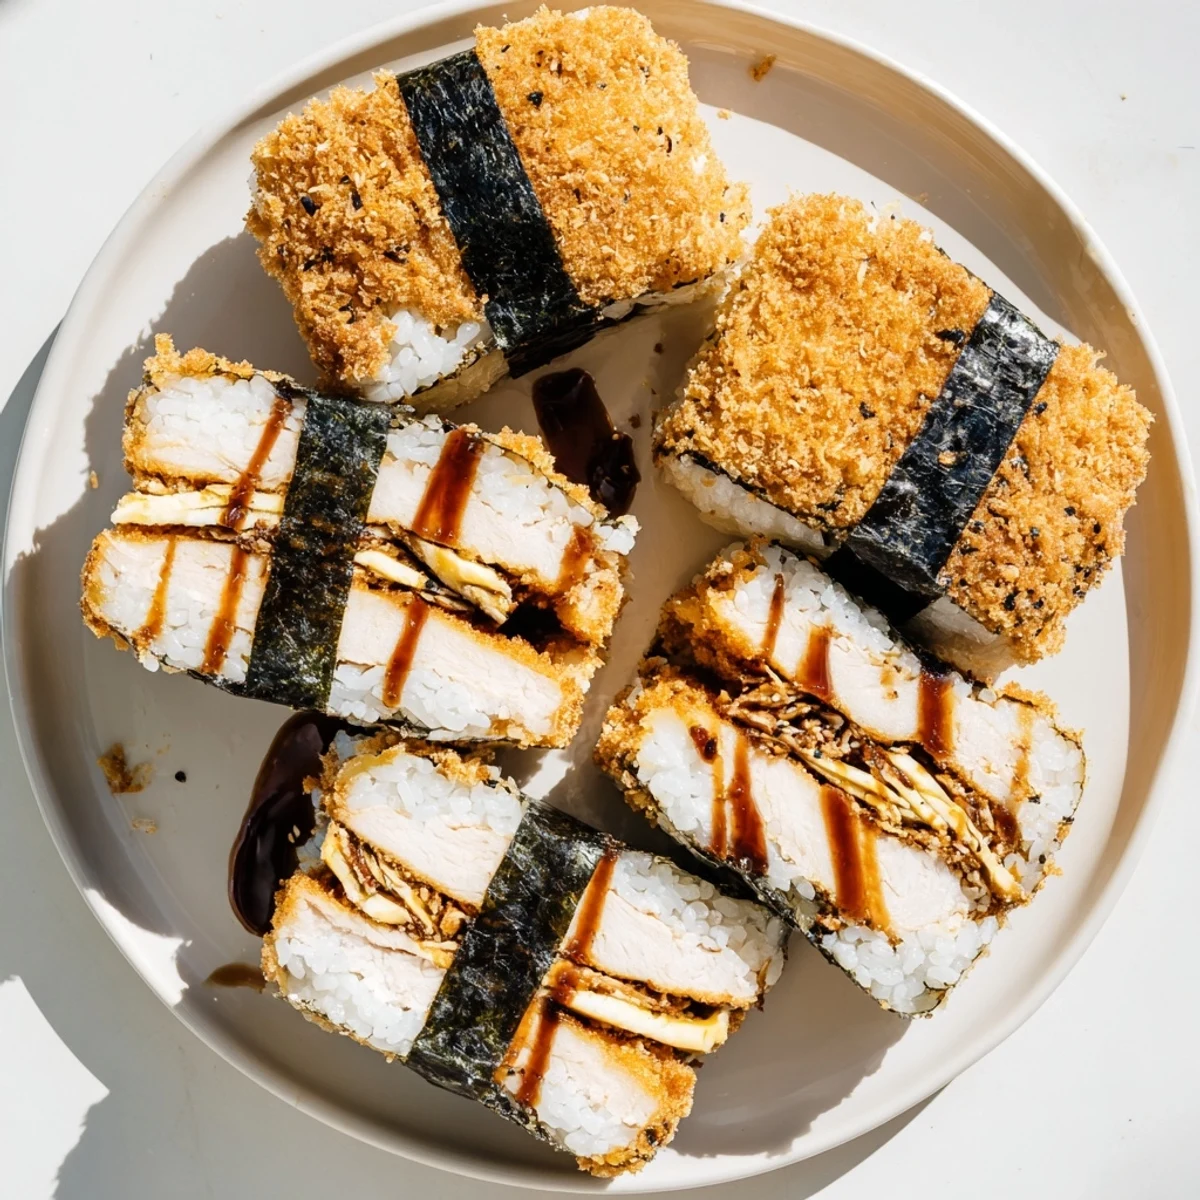
 There's something deeply satisfying about hand-held food that doesn't compromise on texture or flavor. These musubi have become my answer to almost every occasion, from quick lunches to feeding a crowd.
Recipe FAQs
- → What makes musubi different from sushi?
-
Musubi features pressed rice blocks rather than rolled, and often includes cooked proteins like chicken or spam instead of raw fish. The rectangular shape and nori wrapping make it more portable and handheld than traditional sushi pieces.
- → Can I prepare chicken katsu musubi ahead of time?
-
Yes, assemble these up to 24 hours in advance and store refrigerated wrapped in plastic. The nori will soften over time, so for best texture, bring to room temperature before eating. Avoid freezing as the rice texture changes noticeably.
- → What's the best way to reheat musubi?
-
Wrap in parchment paper and warm in a 350°F oven for 10-12 minutes, or microwave for 30-45 seconds. The oven method maintains crispy chicken better, while microwaving is faster but may soften the panko coating.
- → Can I use brown rice instead of white?
-
Brown rice works but creates a different texture and flavor profile. Short-grain brown rice remains stickier than long-grain varieties. The nuttier taste complements the chicken, though the musubi may hold together slightly less firmly.
- → What sauces work well as substitutions?
-
Bull-dog sauce, teriyaki glaze, or even a spicy mayo add different flavor dimensions. For a lighter option, reduce the honey and add more soy sauce. Homemade tonkatsu sauce combines ketchup, Worcestershire, and oyster sauce.
- → How do I prevent the rice from sticking to my hands?
-
Keep a bowl of water nearby and wet your hands thoroughly before pressing each rice portion. You can also lightly oil your hands with sesame oil for added flavor and easier handling. Work with warm rice for best results.
