 Pin This
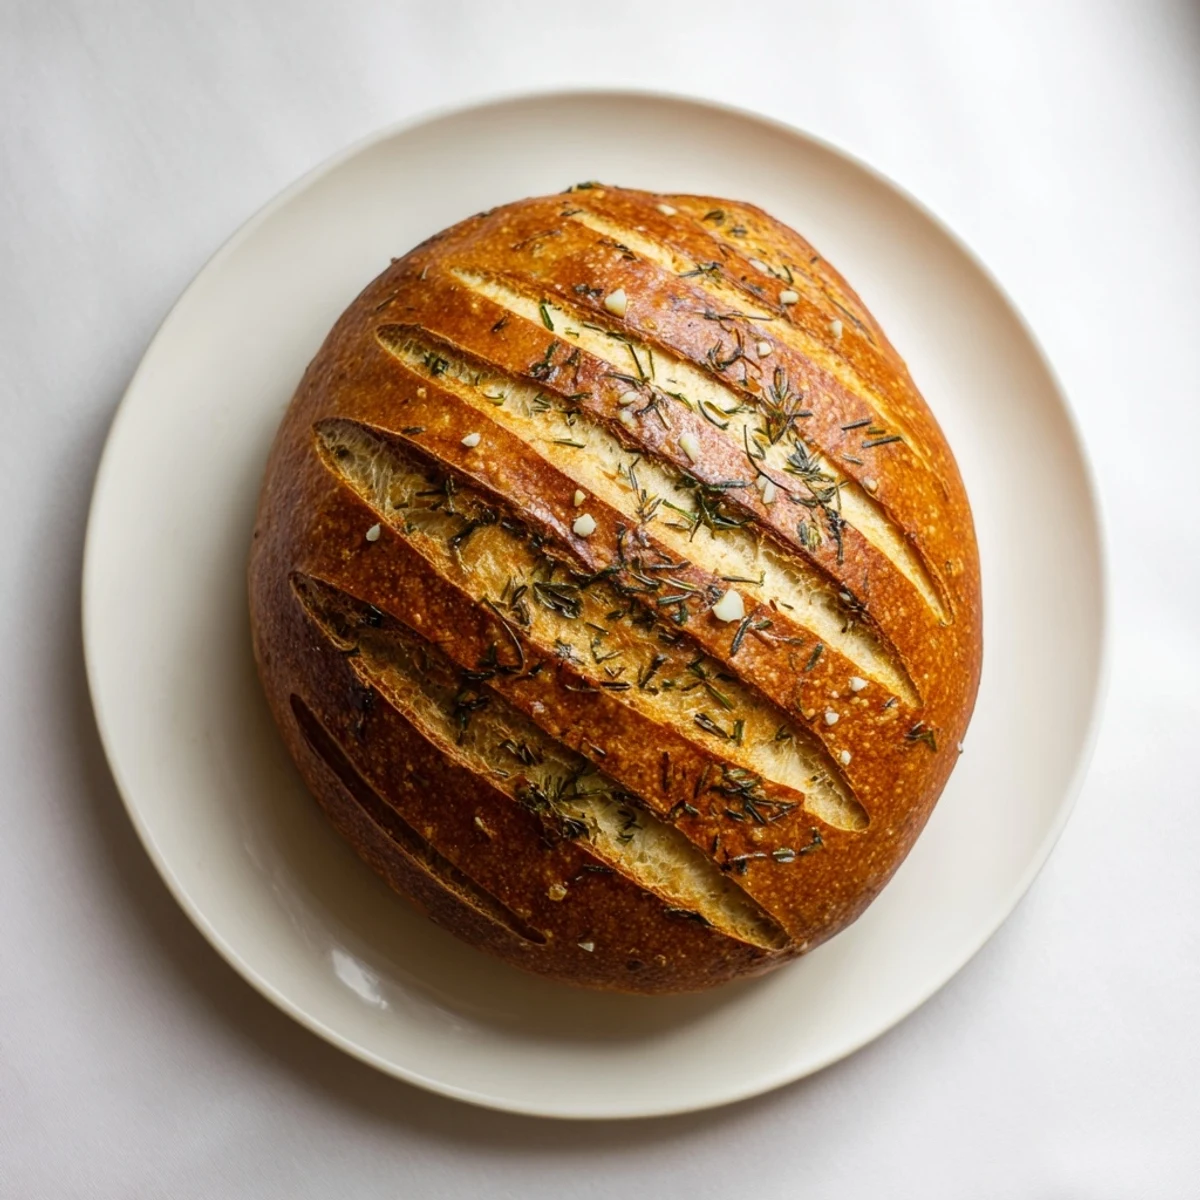
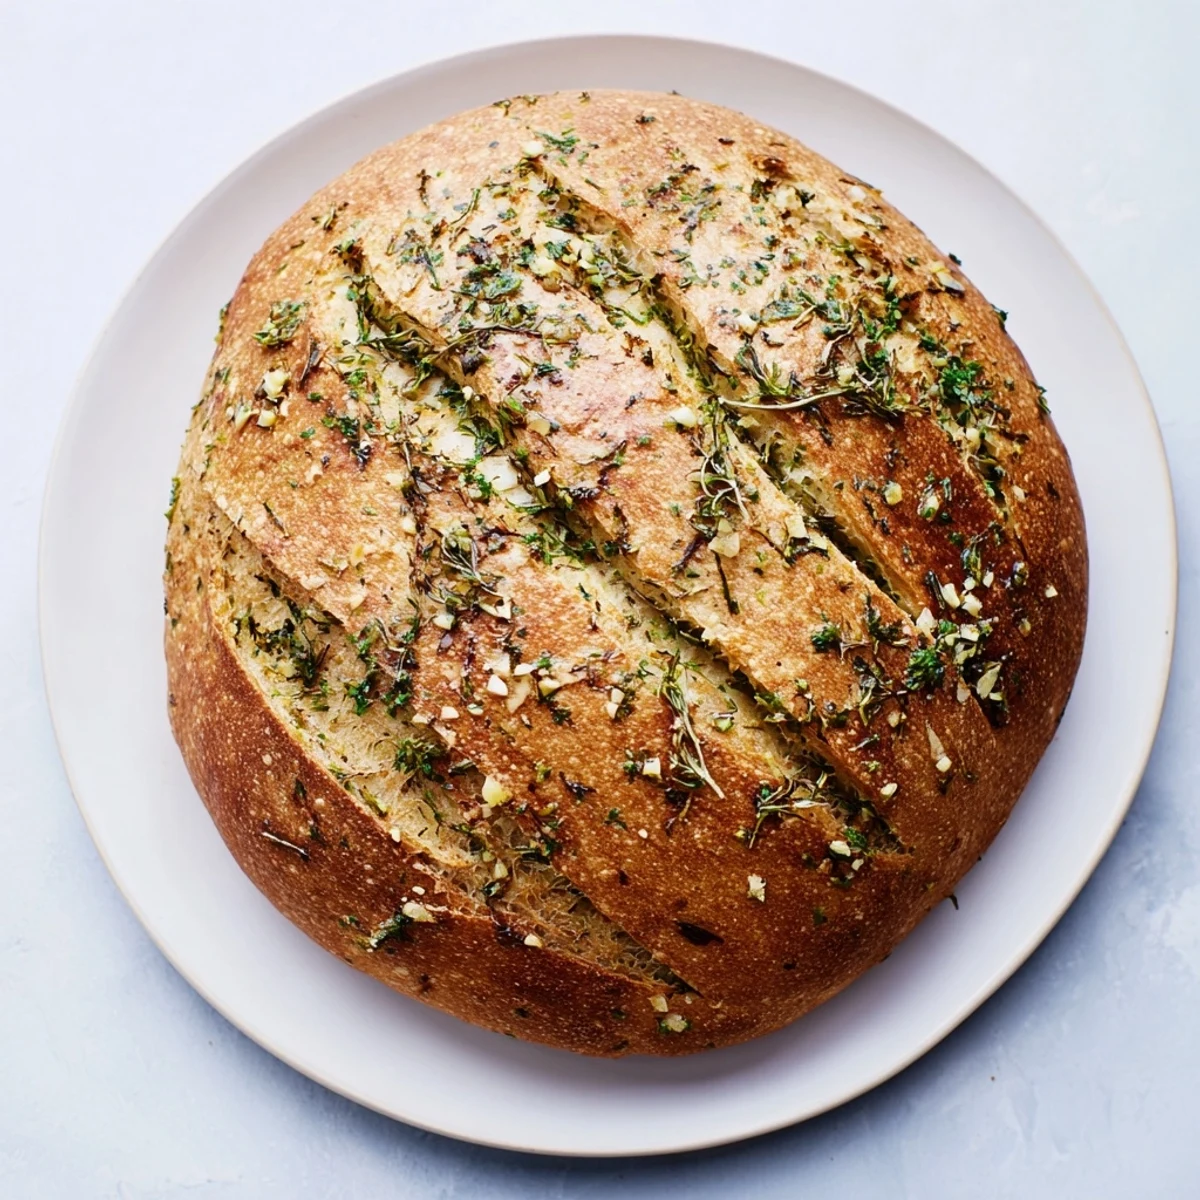
 Create a stunning artisan loaf with minimal effort using your Dutch oven. This rustic bread combines aromatic garlic with a medley of fresh herbs—rosemary, thyme, and parsley—for incredible depth of flavor. The Dutch oven technique creates professional-level results: a crackling, golden crust encasing a soft, tender interior. With just 20 minutes of active preparation and a simple rise time, you'll have bakery-quality bread perfect for sopping up soups, serving alongside salads, or enjoying warm with a pat of butter and extra olive oil.
The smell of garlic and rosemary hitting hot butter still takes me back to my tiny first apartment kitchen, where I learned that bread making is more patience than precision. I burned my first three loaves trying to rush the rise, but that fourth attempt, when I finally let the dough do what it wanted, came out of the Dutch oven with the most dramatic crackling sound. Now I make this bread whenever I need something that makes the whole house feel warm and welcoming.
Last winter, my neighbor texted me at midnight asking what I was baking because the garlic bread smell had drifted through the building vents. I brought over a warm slice, still steaming from the oven, and we stood in the hallway eating it with our hands like conspirators. She now asks for the recipe every time she smells herbs on my stovetop.
Ingredients
- Bread flour: The higher protein content creates that chewy, bakery style crumb structure
- Active dry yeast: Make sure your water feels like bath temperature, about 110°F, to wake up the yeast properly
- Warm water: Too hot kills the yeast, too cold makes it sluggish, so think comfortably warm
- Olive oil: Keeps the dough tender and helps the garlic herbs distribute evenly
- Garlic cloves: Fresh minced garlic infuses the bread better than garlic powder ever could
- Fresh rosemary and thyme: These woody herbs hold up beautifully during baking and release incredible aromatics
- Fresh parsley: Adds brightness and color, especially when sprinkled on top with butter
- Melted butter: That final brush creates a glossy, fragrant finish that makes the bread impossible to resist
Instructions
- Mix the dry foundation:
- Whisk together your bread flour, salt, sugar, and yeast in a large bowl until everything looks evenly distributed.
- Build the dough:
- Pour in the warm water and olive oil, then stir with a wooden spoon until you have a shaggy, sticky mass that comes together in the center.
- Add the aromatics:
- Fold in your minced garlic, rosemary, thyme, and parsley until they are speckled throughout the dough like little flavor gifts.
- Let it rise:
- Cover the bowl with plastic wrap or a damp towel, then walk away for 2 hours while the yeast does its work and the dough doubles.
- Shape your loaf:
- Turn the dough onto a floured surface and gently tuck the edges underneath until you have a round, smooth ball.
- Preheat strategically:
- Place your Dutch oven and lid in a cold oven, then crank it to 450°F and let it heat for at least 30 minutes while your dough rests on parchment.
- Bake with drama:
- Carefully lower the dough into the screaming hot Dutch oven, score the top with a sharp knife, and cover for 30 minutes of steam baking.
- Create the crust:
- Remove the lid and bake another 15 to 20 minutes until the bread turns a deep golden brown and sounds hollow when tapped.
- Finish with flair:
- Brush the hot bread with melted butter and sprinkle extra parsley on top so it glistens like something from a bakery window.
 Pin This
 This bread has become my go to for dinner parties because people literally gasp when I lift off that lid and the crust has already started to form. Last month, my friend admitted she ate three slices standing up at the counter while everyone else was still getting seated.
Making It Your Own
I have experimented with adding grated Parmesan directly into the dough, which creates these incredible salty pockets that surprise you with every bite. Sometimes I swap in dried herbs when I cannot get to the store, using about one third the amount since they are more concentrated.
The Science Behind the Dutch Oven
The covered pot traps steam from the dough itself, keeping the crust soft initially so the bread can expand fully before the heat sets that beautiful, crackly exterior. It mimics professional steam injection ovens without requiring any special equipment.
Serving and Storage
This bread is at its absolute best the day it is made, when the crust is still assertive enough to snap under your knife and the inside is pillowy. If you manage to have leftovers, toast them the next morning and rub with raw garlic for next level bruschetta.
- The bread keeps for 2 days wrapped in a cloth bag, though the crust will soften
- Refresh day old bread in a 350°F oven for 10 minutes to recrisp the exterior
- Slice it thick for maximum structural integrity when dipping into soups
 Pin This
 There is something deeply satisfying about making bread that requires only your hands and a little time, transforming the simplest ingredients into something that makes people stop and linger around the table.
Recipe FAQs
- → What makes Dutch oven bread special?
-
The Dutch oven creates a steam-filled environment that mimics professional deck ovens, producing an exceptionally crisp crust and airy crumb. The heavy lid traps moisture during the initial bake, allowing the dough to expand fully before the crust sets.
- → Can I use dried herbs instead of fresh?
-
Yes, simply use 1 teaspoon of each dried herb instead of the tablespoon amounts for fresh varieties. Dried herbs are more concentrated in flavor, so you'll need less to achieve the same aromatic result.
- → How do I know when the bread is done?
-
The bread is finished when the crust is a deep golden brown and sounds hollow when tapped on the bottom. An instant thermometer inserted into the center should read 190-200°F for perfect doneness.
- → Why score the top before baking?
-
Scoring creates a controlled path for the dough to expand during baking, preventing unsightly ruptures and giving your loaf that classic artisan appearance. It helps the bread rise evenly and develop that beautiful oven spring.
- → Can I add cheese to this dough?
-
Absolutely! Grated Parmesan or aged cheddar works wonderfully folded into the dough before rising. The cheese melts throughout the crumb and creates savory pockets of flavor that complement the garlic and herbs perfectly.
- → How should I store this bread?
-
Keep the loaf at room temperature wrapped in a cloth or paper bag for up to 2 days. For longer storage, slice and freeze in a freezer bag, then toast individual slices as needed. Avoid refrigeration, which accelerates staling.
