 Pin This
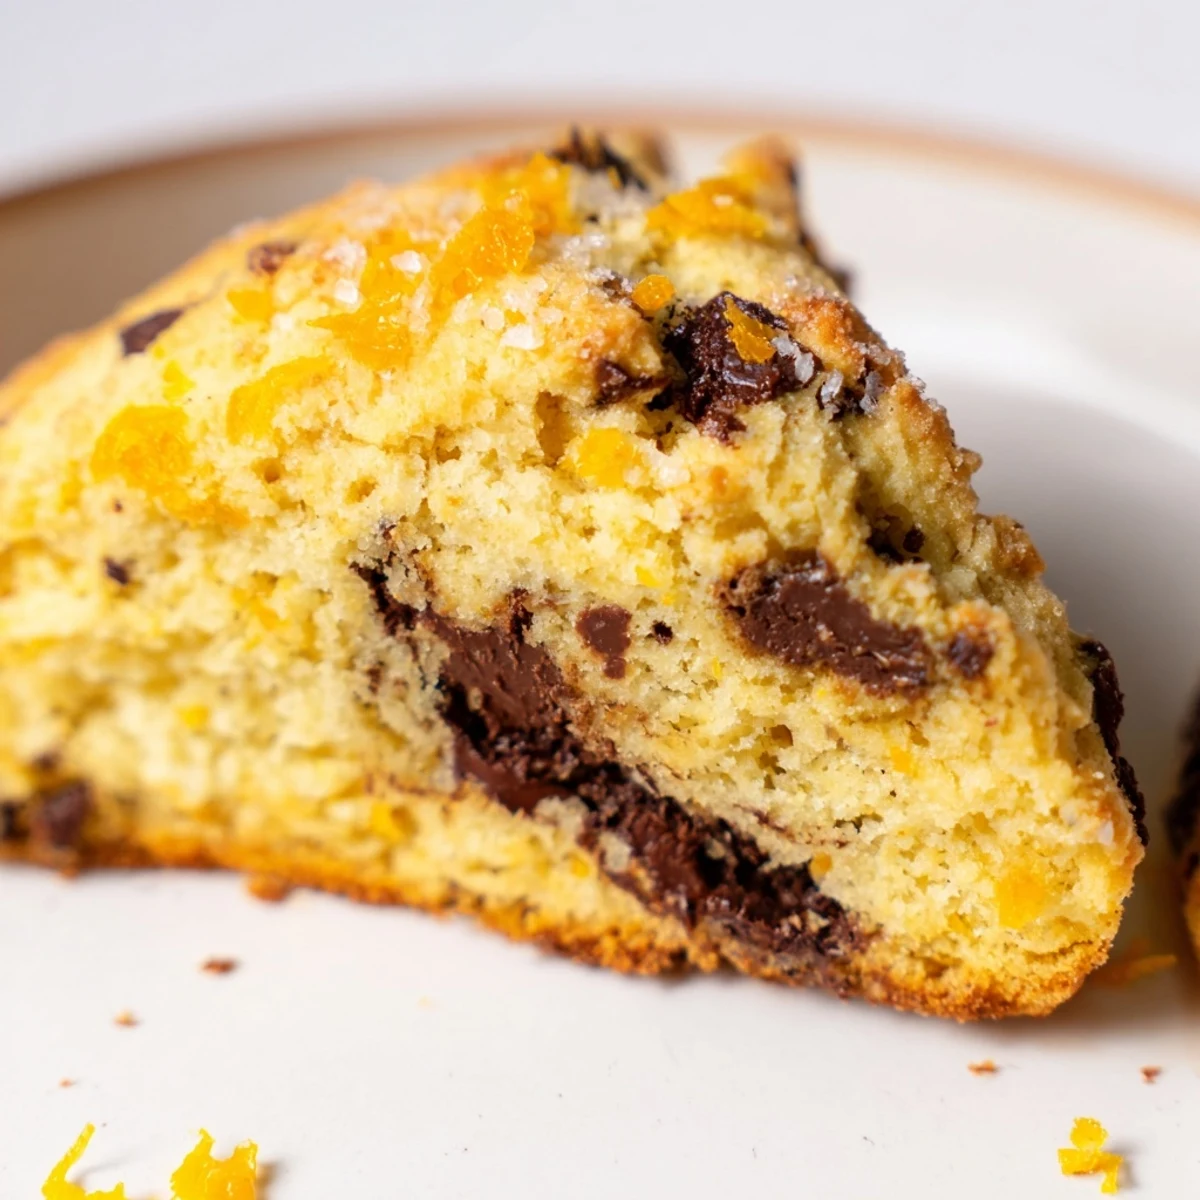
 Experience tender, buttery scones infused with vibrant orange zest and studded with dark chocolate chunks. This quick bake combines simple dry ingredients with creamy elements to create a delicate crumb and a rich flavor balance. The cold butter cut into the flour creates a flaky texture, while the addition of orange zest brightens each bite. After folding in the dark chocolate, the dough is shaped and baked until golden brown with an optional sprinkle of turbinado sugar for extra crunch. Serve warm for a comforting breakfast or an indulgent teatime treat.
I discovered these dark chocolate orange scones on a drizzly Saturday morning when I decided to experiment with combining two flavors I'd always loved separately. The brightness of fresh orange zest paired with rich, melting dark chocolate felt like waking up to something special, and now they're the first thing I reach for when I want breakfast to feel a little less ordinary.
There was a Tuesday when unexpected guests texted to say they were stopping by in forty minutes. I had all these ingredients on hand and remembered these scones. Pulling them out of the oven golden and fragrant, watching everyone's faces light up with that first bite—that's when I knew this recipe had to become a permanent part of my rotation.
Ingredients
- All-purpose flour (2 cups or 250 g): The foundation that keeps things tender—measure by spooning and leveling for the most reliable results
- Granulated sugar (1/3 cup or 65 g): Just enough sweetness to let the chocolate and orange shine without overwhelming them
- Baking powder (1 tbsp): Your lift, your rise, your guarantee of that light, fluffy crumb
- Salt (1/2 tsp): The quiet amplifier that makes every other flavor pop
- Unsalted butter (1/2 cup or 115 g), cold and cubed: Cold butter is non-negotiable here—it's what creates those tender pockets of flakiness you're after
- Heavy cream (2/3 cup or 160 ml), plus more for brushing: The secret to keeping these scones tender without needing buttermilk
- Large egg (1): The binder that holds everything together with grace
- Orange zest (from 1 large orange): Use a microplane and don't skip this—zest is where all the citrus personality lives
- Pure vanilla extract (1 tsp): The undertone that deepens both the chocolate and orange notes
- Dark chocolate (3/4 cup or 120 g), chopped (60–70% cocoa): Go for chocolate you actually love eating—this isn't the place to use cooking chocolate you'd never snack on
- Turbinado sugar (optional, for sprinkling): If you want that sparkle and crunch on top
Instructions
- Get Everything Ready:
- Preheat your oven to 400°F (200°C) and line a baking sheet with parchment paper. Everything from here on moves quickly, so gather your bowls and whisk before you start.
- Build Your Base:
- In a large mixing bowl, whisk together the flour, sugar, baking powder, and salt. Take your time here—whisk means air, and air means lift.
- Cut in the Cold Butter:
- Add those cold, cubed butter pieces to the dry mixture. Now grab either a pastry cutter or just use your fingertips, working quickly so the butter stays cold. You're looking for a texture that resembles coarse sand or breadcrumbs—those tiny butter pieces are what creates your flakiness. This should feel quick and almost meditative.
- Mix the Wet Team:
- In a separate bowl, whisk together the cream, egg, orange zest, and vanilla extract. Smell that zest—that's your signal you've got the good stuff.
- The Part Where Magic Happens:
- Pour your wet ingredients into the dry mixture. Now here's the critical moment: stir gently, and stop as soon as you see no more dry flour. I mean it. Overworking develops gluten, which makes scones tough instead of tender. If it looks slightly shaggy, that's perfect.
- Fold in the Chocolate:
- Gently fold in your dark chocolate chunks. Each piece is a flavor surprise waiting to happen.
- Shape and Cut:
- Turn the dough out onto a lightly floured surface. Press it gently into a disk about 1 inch thick—don't compress it. Using a sharp knife, cut the disk into 8 wedges like you're cutting a pie. Transfer each wedge to your prepared baking sheet, spacing them about 2 inches apart. They need room to breathe.
- The Golden Touch:
- Brush the tops lightly with extra cream and sprinkle with turbinado sugar if you're using it. This is what gives you that beautiful glisten and slight crunch.
- Bake to Golden Perfection:
- Slide into the oven for 16 to 18 minutes. You're looking for golden brown tops and a slight firmness when you press the side gently. The scones will continue cooking slightly as they cool, so pull them when they look just set.
- Cool and Serve:
- Transfer to a wire rack and let them cool just slightly—they're best enjoyed warm, when the chocolate is still a bit soft and the butter is singing.
 Pin This
 These scones have become my morning ritual on quiet days, the kind of breakfast that doesn't need much—just maybe a cup of tea and a moment to yourself. There's something about the contrast of bright citrus and deep chocolate that feels like giving yourself permission to start the day a little slower, a little sweeter.
When You're Missing Something
Don't have fresh orange on hand? You can reach for orange extract instead—use about 1/2 tsp instead of zesting a fresh orange. The flavor won't be quite as bright, but it'll still be delicious. And if you only have milk chocolate or white chocolate sitting in your pantry, this recipe happily adapts to either one. I've made these with all three combinations, and they're good in different ways—dark chocolate feels sophisticated, milk chocolate feels nostalgic, and white chocolate becomes almost like a shortbread scone with a citrus kick.
Serving Ideas That Clicked
The obvious pairing is warm with a thin spread of salted butter, but if you want to lean into the orange, orange marmalade is the one. I've also served these at afternoon tea with clotted cream and jam, which might be fancier than necessary but feels wonderful on special days. Leftover scones, if you have them, can be sliced and gently toasted the next morning to revive them.
Keeping These Fresh
Scones are best the day you make them when they're still tender and the chocolate hasn't set completely. That said, life happens, and you might have leftovers. Store them in an airtight container at room temperature for up to 2 days. If you want to make them ahead, you can freeze the shaped, unbaked scones on a baking sheet and then bake them straight from frozen, adding just a minute or two to the baking time. It's the kind of workaround that means you can wake up to fresh scones almost any morning.
- One more thing—if you're doubling this recipe for a crowd, keep your ingredients cold and work in smaller batches rather than trying to mix it all at once
- The dough can be made several hours ahead and kept covered in the fridge until you're ready to shape and bake
- If your scones spread too much in the oven instead of rising, your oven might be running cool—check it with an oven thermometer next time
 Pin This
 These scones have taught me that breakfast doesn't need to be complicated to feel indulgent, and that some of the best discoveries happen when you're brave enough to combine flavors you love. Make them, share them, and then make them again.
Recipe FAQs
- → What type of chocolate works best in these scones?
-
Dark chocolate with 60–70% cocoa content provides a deep, rich flavor and subtle bitterness that complements the bright orange zest perfectly.
- → How does the butter affect the texture?
-
Using cold, cubed butter cut into the dry ingredients creates flaky layers by releasing steam during baking, resulting in tender and light scones.
- → Can these scones be made dairy-free?
-
Substitute butter with a plant-based alternative and use a non-dairy cream or milk to maintain moisture and tenderness, though flavor will slightly differ.
- → What role does the orange zest play?
-
Orange zest adds fresh, citrusy brightness that balances the richness of the chocolate and butter, enhancing overall flavor complexity.
- → How should scones be stored after baking?
-
Keep scones in an airtight container at room temperature for up to two days to preserve freshness and texture.
